h

Twilight, Travel, and Treats

Reflections of a Twihard on all things twilight, travel, and treats.

It's Honolulu Girl's birthday today!

As you can guess the phrase in the title is Hawaiian for Happy Birthday - I have no idea how to pronounce it and I'm not sure if HG/Suzie does either given what a Cali girl she really is.

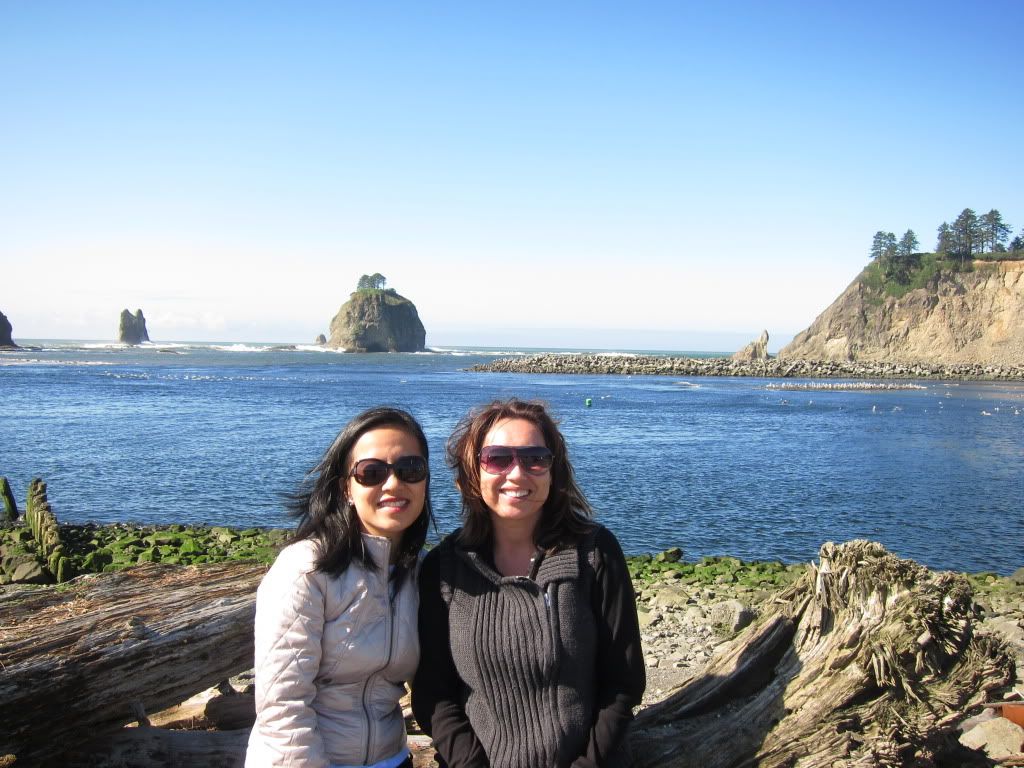
Us at First Beach La Push - gorgeous day!

Remember that Suzie was my Forks trip roomie? We met through her blog True Blood Twilight a year ago. I am so happy to have met such a kindred spirit in this Twilight blogosphere. If it weren't for us sticking it out together in the small town we probably would have run screaming to the nearest Four Seasons. We clicked from the get go and I'm forever grateful that she convinced me to join her.

This girl is busy - she's got her regular blog True Blood Twilight


plus a film review blog I Adore Books and Film that she shares with her teenage daughter.


She's also a writer of very hot fanfiction

Cinderella: A Tale of Lust

Enchantment
Le Moulin Rouge
She has a regular day job but her real passion is writing and film. She's now writing film reviews in Inside Out Hawaii magazine. Also who can forget her recent extra work on Hawaii 5-0 with the gorgeous Alex O'Loughlin.

Suzie I feel for you with the closed eyes.
But we're all looking at the cute guy anyways ;)

Since you're now an iPad addict as well I made you some super simple birthday gifts. Remember I've been going for minimalist recently - finding it easier to look through my iPad apps that way.

Click for 1024X1024px.
With a bit of Bella and Edward from Breaking Dawn
Sorry for not making you a True Blood one but with all the RobPorn on my computer there isn't any space for Alex Skarsgard :)

I will however throw in a pic that someone else made with my little message added :) Thought this desktop was very pretty.


Here are some messages from kiTT at Tongue-Twied


And an awesome video kiTT made. Gotta love the 80's


Robmusement

And Lisa


Happy Birthday my dear! Love you and miss you so!

Now that we finished making the cupcakes in part 1 now we move on trying to replicate this guy.
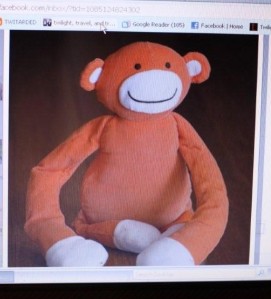
Birthday boy's favourite stuffy


Here's the final product.

Learn to make these


First thing is that I had to figure out if these monkeys were intended for decoration only or for consumption. Fondant is for eating and gumpaste is for looking pretty. Also, I use toothpicks usually to hold the heads up so it's good to know ahead of time how easily it will need to be removed.

Gumpaste is what you normally see used to make those hard realistic leaves and flowers on cakes at weddings. You can roll and mold it into very fine and thin pieces and it will hold its shape. It dries out very quickly so usually I keep any pieces that I am saving to work on under a small bowl to keep them from drying out.

I use the Satin Ice brand because it comes in big tubs which are cheaper. For a beginner, you can buy gumpaste to start at Michael's and the price is good if you have a 40% off coupon from their email list. This stuff is technically edible but it is chewy, doesn't taste so great but it's a bit sweet, and frankly I don't think it's very good for your gastrointestinal system.

You can make flowers like these and there are lots of tutorials online.

gumpaste flowers from bakinguntilgolden.com


Fondant is usually used to cover wedding and birthday cakes for a smooth finish. It is also good for figurine making but it takes longer to harden and it is harder to make small or thin pieces. If the figurines are intended for consumption then I'll use fondant instead of gumpaste.

Colouring gumpaste or fondant


Orange wiltons gel colouring added to the gumpaste with a toothpick - made the night before I plan to make my figurines so I can see the colour darken overnight and add any if I need to.
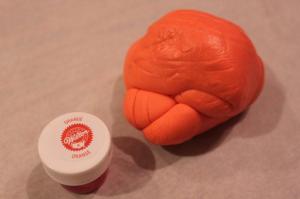
Store gumpaste or fondant airtight in saran wrap
overnight and in a tupperware to see the final colour as it deepens.

Making the figurines


Using orange gumpaste we have just coloured and also white or a slight beige gumpaste I have already made.

I work on parchment paper which doesn't stick to the gumpaste.

I usually will make a sketch and then a trial figurine. Once I'm happy with the trial I'll weigh it so I can know how much gumpaste to allot for each piece.

Another way of making sure your limbs are even is to roll your gumpaste into a snake shape and then divide it evenly into the number of pieces you need. No weighing needed but visually super easy to do.
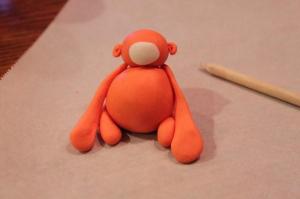
First trial, hands are way too big


Using fondant glue or just water with a very fine paintbrush to attach the parts. Fondant glue is a small piece of fondant dissolved with a few drops of water.

Parts include oval head, trapezoid body all made of orange plus 2 long arms, 2 short legs, and a tail all with white gumpaste blended in at the end. You take the long piece for your limb and at the end place a small piece of white (about the size of a piece of Nerd candy) and then roll them together a few times in your palm. The warmth will melt them together quite seamlessly.

The only tools I really use are my hands plus rounded and pointed toothpicks. Honestly the hardest part to do is putting on the ears and making sure they don't fall off.

I break a toothpick in half and stick it into the body first and then the head on top. Also remember to use some water or fondant glue under the head.

For the ears take a small orange ball and indent with rounded toothpick then place even smaller white ball inside and repeat with rounded toothpick. Pinch off the pointy tip and then stick the rounded ear onto the head, using glue or water as mentioned below and your toothpicks to apply pressure. My sister in law uses tweezers but I like using toothpicks and my fingers instead.

Final product isn't he cute?


See above for how to blend the
white into the tail


I use Wilton Edible Food Writers (food colouring pens) fine tip to draw on the eyes and mouth. This part makes me the most nervous because there is no easy redo unless you take the head off and do it all over again.

Here is the group of monkeys I made (it's about 3am by the time I'm finished - can't start until the kids are asleep).

About to attack


I placed them all on disc of orange gumpaste and then onto squares of parchment paper.

Transport


This is the part that strikes fear into any baker. Even if you make it how do you get it there in one piece?

I pack all the figurines on parchment squares in individual gladware or tupper containers. Right before I load them into the car (after they have been drying at least overnight) I gently pack a bit of paper towel around each one to prevent shifting.

In gladware waiting for paper towel to be packed
around each one to prevent shifting


Then I load them onto a baking tray lined with a silpat (either use silicone or a wet towel to prevent slipping around in the car).

Onto the cupcakes I made in Part 1 of this post.

Fondant polka dots


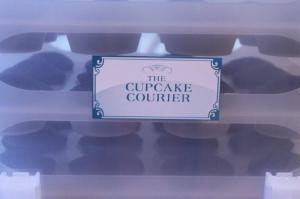
I use a Cupcake Courier and I love it. My sister in law/baking partner JL managed to find them at our local Winner's store (kind of like Ross but with household stuff in addition to clothes) for about $25 Cdn each - steal!


The only downside is there are no trays so far for mini cupcakes. I will have to use my cricut to cut out some plastic adapter sheets later on.

This handy thing fits perfectly in my trunk with one of the third row seats half folded.


Delivery and Set Up


Managing to slow way down around corners and trying to choose the least steep streets to my destination, I finally made it. Mad rush since the Olympic torch was coming down this street in less than 90 minutes and I wanted to be out of there before traffic got too busy.

I brought my ceramic cake stands for set up as well and birthday boy's mommy (who is also the sister of a long time friend) swore to keep my stands safe.


Final set up - Birthday Boy's mommy almost cried, like full on "this is just what I wanted" tears. That made staying up until 3:3oam totally worth it.

Monkey cupcakes finally done!


I'll be updating my Flickr cupcake pics very soon and send out a shout when they're up.

Enjoy and let me know if you have questions.

I was asked to do chocolate cupcakes with blue icing and monkeys on top for a one year old birthday celebration.

Not to be anti-climactic but here is the final cupcake product just so you know what I'll be getting to.

Follow my instructions to make these


Part 1 will be the cupcakes.

Part 2 will be the monkeys.

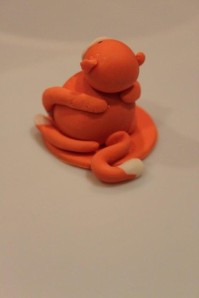
This monkey was the original inspiration for these guys.

Birthday boy's favourite stuffy


I'll list the original recipe first. Then my changes and photos after to make it easier for you to cut and paste if needed.

First we have to make cupcakes.

Learn to make these


Chocolate Cupcakes (Recipe Martha Stewart's One Bowl Chocolate Cake)


Ingredients


Makes about 45 regular cupcakes (or 2 eight-inch square or 3 eight-inch round layers)
  • for cake (not cupcakes) - unsalted butter for cake pans
  • 1 1/2 cups unsweetened cocoa powder (plus more for cake pans)
  • 3 cups all-purpose flour
  • 3 cups sugar
  • 1 tablespoon baking soda
  • 1 1/2 teaspoons baking powder
  • 1 1/2 teaspoons salt
  • 3 large eggs
  • 1 1/2 cups buttermilk (substitute 1 1/2 tbsp topped up to 1 1/2 cups with regular milk - let sit 5 min)
  • 3/4 cup vegetable oil
  • 1 1/2 teaspoons pure vanilla extract

Directions


  1. Preheat oven to 350 degrees. If making cupcakes, just fill the cupcake/muffin tins with liners. If making cakes butter round or square cake pans, and line bottoms with parchment; butter parchment, and dust with cocoa.
  2. Into the bowl of an electric mixer fitted with the paddle attachment, sift cocoa, flour, sugar, baking soda, baking powder, and salt. With the mixer on low, stir in eggs, 1 1/2 cups warm water, buttermilk, vegetable oil, and vanilla until smooth, about 3 minutes.
  3. For cupcakes, fill with a large ice cream scoop filled to about 1/4 inch from the top. Bake about 25-27 minutes until toothpick comes out clean and dry. (For cake, divide batter among prepared pans. Bake, rotating once, until tester inserted in center comes out clean, 35 to 45 minutes for 8-inch layers, depending on amount of batter.)
  4. Let cakes cool in pans on a wire rack for 20 minutes, then remove from pans and cool completely, right side up on rack.

I used Fry's cocoa and 2% milk


Love these brown cupcake liners


You can buy brown cupcake liners online at Confectionery House. I was lucky a local baking supply store Scoop-N-Save in Langley, B.C. (I know, sounds like a kitty litter place) has them in stock.

Dry ingredients all in - very full bowl
Be careful to go slow with the mixer


A very wet batter = very moist cupcakes


Fill a large ice cream scoop to slightly below the top


Filled about 2/3 of the way (best to use ice cream scoop method above)


Cooling - don't eat them yet even though
they'll smell divine


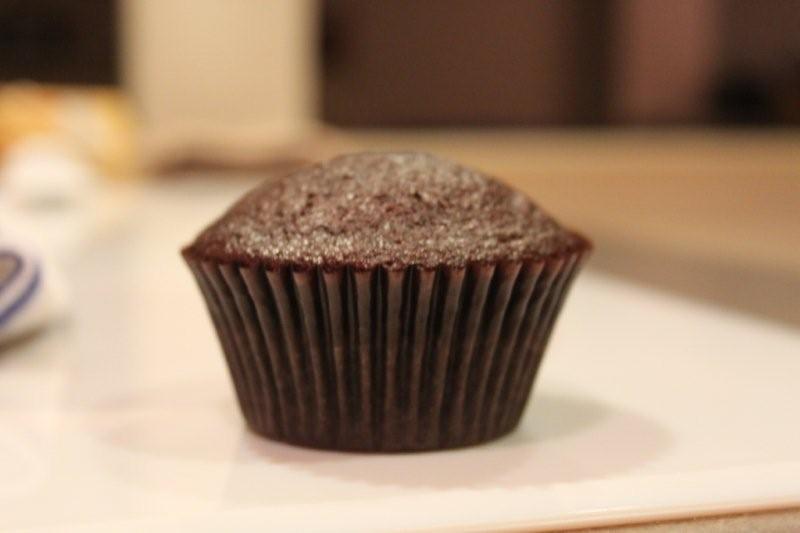
Perfect small dome for this project
Not a huge muffin top


They can't all be perfect - the kids and Mr. TC love eating the rejects


You could adapt these to mini cupcakes and probably reduce the baking time to ab0ut 17 minutes. Try it out in your oven and use your toothpicks to test for doneness.
Icing


Even though this was a kids birthday I chose a slightly less sweet icing recipe. This buttercream takes a bit more finesse to make but it is worth the effort as it is light in texture but still sweet enough for the kids). You will need a candy thermometer.

Italian Meringue Buttercream (Recipe Martha Stewart)


Ingredients


Makes 4 1/2 cups
  • 1 1/4 cups sugar
  • 5 large egg whites (buy pasteurized egg whites in a container to reduce risk of salmonella)
  • Pinch of cream of tartar
  • 1 pound (4 sticks) unsalted butter, chilled cut into small chunks
  • 1 teaspoon pure vanilla extract

Directions


  1. In a small saucepan over medium heat, bring sugar and 2/3 cup water to a boil. Continue boiling until syrup reaches 238 degrees.on a candy thermometer (soft-ball stage). As soon as it hits this point, race over to your mixer.
  2. Meanwhile you will have to prepare the egg whites. Place egg whites in the bowl of a standing mixer fitted with the whisk attachment, and beat on low speed until foamy. Add cream of tartar, and beat on medium-high speed until stiff peaks but not dry; do not overbeat.
  3. With mixer running, add syrup to whites in a stream, beating on high speed until no longer steaming, about 3 minutes. Add butter bit by bit, beating until spreadable, 3 to 5 minutes; beat in vanilla. If icing curdles, keep beating until smooth. If you just use the whisk the icing never looks smooth. So after beating for at least 5 minutes with the whisk use your paddle attachment for another few minutes until it looks like most air bubbles are gone and icing is smooth.

On high until 238 (soft ball stage)


Egg whites with cream of tartar beat into
stiff peaks before adding sugar syrup


Beating with paddle attachment to finish off
- almost all air bubbles gone


Next to colour the icing. The birthday boy's mom had a very specific blue in mind. It's always hard to tell what the gel food colouring will actually look like so I had to try a few. You can use liquid food colouring instead but I only have gels because they work well with fondant and gumpaste.

This was the final choice - Royal Blue


Sky blue a bit too teal


Cornflower blue too gray


Baby boy blue


Using a 1M tip for a pretty swirl


Using a piping bag and icing tip is really easier than just using a butter knife and spreading it on. Here is the Wilton's page of how to frost with a 1M tip.

I don't hesitate to use a butterknife to scrape off frosting and redo a cupcake until it's perfect.

Cupcakes done, now onto the monkeys


By the way, birthday boys mom also loves polka dots. So I rolled out some brown fondant very thinly and used the tip of a large round piping tip to cut out some polka dots and sprinkled them over top of the cupcakes. Do this step right after icing them. Otherwise it's hard to get the polka dots to sit well in icing that has hardened.

Fondant polka dots


These are great basics for any party and bake sale. Now if you want to step it up then head on to part 2 - Monkey Figurines.