


My youngest turned 5 recently and wanted a Lego birthday. I debated between making him a Lego cake covered in fondant or doing something easier. Since he loves chocolate I decided to make chocolate Lego men on cupcakes instead.
I started out with a Lego figurine ice cube mold from Lego.com (thanks Santa).
Since I was making these for kids I opted to melt chocolate chips rather than really going through the task of tempering chocolate. The chocolate chips can result in an oxidized waxy look after a couple of days but the kids wouldn't care. 
Since I'd be refilling the piping bag very often and remelting the chocolate I used a ziploc bag with the corner cut off instead of my standard parchment paper cones.
Goes in the freezer for 15 minute and pops out of the silicone easily. 
Stays smooth and shiny for a day so if you care about this don't make then too far in advance. 
Where are the Lego CSI guys? Note overfilling the mold is hard to fix unless you remelt them - or just let the birthday boy eat your mistakes!
Finished products on vanilla Italian meringue buttercream (Martha Stewart recipe) on devil's food cupcakes.
All in all a hit with boys young and old.
-
 Recently I did a search for "Disney CME" and couldn't find a comprehensive listing anywhere. So I decided to create one for 20...
 -
Hey everyone, I just fell in love with a new story - it just finished and guess what? It's going to be pulled on October 1st from fanf...
-
Rob's fingers inspire me By the way all the sheet music below is listed on my Sheet Music page for this blog. I've also include...
-
You all know I love Carter Burwell's Twilight songs because they are so friendly for us amateur pianists. Here's the latest theme ...
-
 While making a card this weekend I was in the search for a good Cricut stencil font I realized there was no comprehensive list. So I made on...
 -
 So last month I posted that I wasn't sure if I should go to the Official Twilight Convention Tour or TwiTour for short. I can't...
 -
For all of my friends and family who are potentially reading this, there may be too much information for you in this post. It's emotion...
-
 So you know how in the movie Julie & Julia the woman bakes her way through Julia Child's cookbook Mastering the Art of French Cooki...
 -
 Hydraulic Level 5 by Gondolier I'm really an indoor girl. I don't do extreme sports. I live at the bottom of a ski hill and hav...
 -
I finally got the chance to see La La Land and absolutely loved it. Not just because I have loved Ryan Gosling since The Notebook but becaus...
Follow Me Also At


Popular Posts

Grab My Button


Wow, a treats post for once. It has been almost two months since I've posted a dessert recipe review.
First of all, I CAN eat gluten yet this cake is so good I would choose to have it even if regular cake was around.
Note that my husband is very very picky and not easily impressed. Yet he said this dessert could have easily been served at a fancy restaurant.
My good friend Mrs. R had us over for dinner the other night and her son J has celiac disease and thus needs everything to be gluten-free. She hadn't made this recipe before but thought it looked promising and we were both up for an adventure.
Decadent Gluten Free Chocolate Cake
by John D Lee found on here
 |
| Photo: Paul Goyette (flickr) |
Ingredients:
3 X 100gram, 70% cocoa dark chocolate bars
1 1/2 cups of sugar
1 1/4 sticks of butter
A pinch of salt
5 eggs
1) Pre-heat oven the oven to 350 degrees.
2) Over a double boiler with barely simmering water underneath, melt the chocolate and sugar, salt, and butter together.
3) When smooth, remove from heat and let cool for a couple of minutes.
4) Meanwhile, beat the eggs.
5) When the chocolate has cooled slightly, fold the eggs in and pour into an 8 inch greased cake pan or pie plate.
6) Bake for 40 minutes, or until a fork inserted comes out pretty clean.
7) Let cool for a few minutes and serve still warm.
Serve with vanilla ice cream and coffee.
 |
| Photo: Paul Goyette (flickr) |
So, here's my two cents.
First of all Mrs. R shelled out for Lindt's 70% dark and Green & Blacks organic dark chocolate.
The instruments to melt everything together was confusing. Melting chocolate in the double boiler is easy but getting the granulated sugar to melt didn't happen. We initially microwaved the chocolate to almost melt and then the butter melted right in over the double boiler but the sugar never did. When we put it in the oven it was still gritty and Mrs. R was so nervous I think she started defrosting another dessert.
We tempered the eggs with a bit of the batter before folding the eggs back into it.
It baked up perfectly at 40 minutes.
Our cake did not look like the one in the photo. The cake had a crackly texture on top rather than the smooth ganache shiny look but it was still pretty, just a variation. Mrs. R dusted it with some powdered sugar. We had it with ice cream and it was so good!
Crunchy on top, gooey in the middle, and just a bit chewy at the base. I was too busy eating to even take a photo.
So, thumbs up for the first gluten-free recipe on this blog. Hope you enjoy it!
Lastly, Mrs. R is a closet twihard. She came with me to the pre-midnight showing of New Moon and also Remember Me. She surprised me at dinner with something sweet.
 |
| New Moon chocolate bar - oh an Edward one |
What's your favourite Twilight food?
I was asked to do chocolate cupcakes with blue icing and monkeys on top for a one year old birthday celebration.
Not to be anti-climactic but here is the final cupcake product just so you know what I'll be getting to.
 |
| Follow my instructions to make these |
Part 1 will be the cupcakes.
Part 2 will be the monkeys.
This monkey was the original inspiration for these guys.
 |
| Birthday boy's favourite stuffy |
I'll list the original recipe first. Then my changes and photos after to make it easier for you to cut and paste if needed.
First we have to make cupcakes.
 |
| Learn to make these |
Chocolate Cupcakes (Recipe Martha Stewart's One Bowl Chocolate Cake)
Ingredients
Makes about 45 regular cupcakes (or 2 eight-inch square or 3 eight-inch round layers)
- for cake (not cupcakes) - unsalted butter for cake pans
- 1 1/2 cups unsweetened cocoa powder (plus more for cake pans)
- 3 cups all-purpose flour
- 3 cups sugar
- 1 tablespoon baking soda
- 1 1/2 teaspoons baking powder
- 1 1/2 teaspoons salt
- 3 large eggs
- 1 1/2 cups buttermilk (substitute 1 1/2 tbsp topped up to 1 1/2 cups with regular milk - let sit 5 min)
- 3/4 cup vegetable oil
- 1 1/2 teaspoons pure vanilla extract
Directions
- Preheat oven to 350 degrees. If making cupcakes, just fill the cupcake/muffin tins with liners. If making cakes butter round or square cake pans, and line bottoms with parchment; butter parchment, and dust with cocoa.
- Into the bowl of an electric mixer fitted with the paddle attachment, sift cocoa, flour, sugar, baking soda, baking powder, and salt. With the mixer on low, stir in eggs, 1 1/2 cups warm water, buttermilk, vegetable oil, and vanilla until smooth, about 3 minutes.
- For cupcakes, fill with a large ice cream scoop filled to about 1/4 inch from the top. Bake about 25-27 minutes until toothpick comes out clean and dry. (For cake, divide batter among prepared pans. Bake, rotating once, until tester inserted in center comes out clean, 35 to 45 minutes for 8-inch layers, depending on amount of batter.)
- Let cakes cool in pans on a wire rack for 20 minutes, then remove from pans and cool completely, right side up on rack.
 |
| I used Fry's cocoa and 2% milk |
 |
| Love these brown cupcake liners |
You can buy brown cupcake liners online at Confectionery House. I was lucky a local baking supply store Scoop-N-Save in Langley, B.C. (I know, sounds like a kitty litter place) has them in stock.
 |
| Dry ingredients all in - very full bowl Be careful to go slow with the mixer |
 |
| A very wet batter = very moist cupcakes |
 |
| Fill a large ice cream scoop to slightly below the top |
 |
| Filled about 2/3 of the way (best to use ice cream scoop method above) |
 |
| Cooling - don't eat them yet even though they'll smell divine |
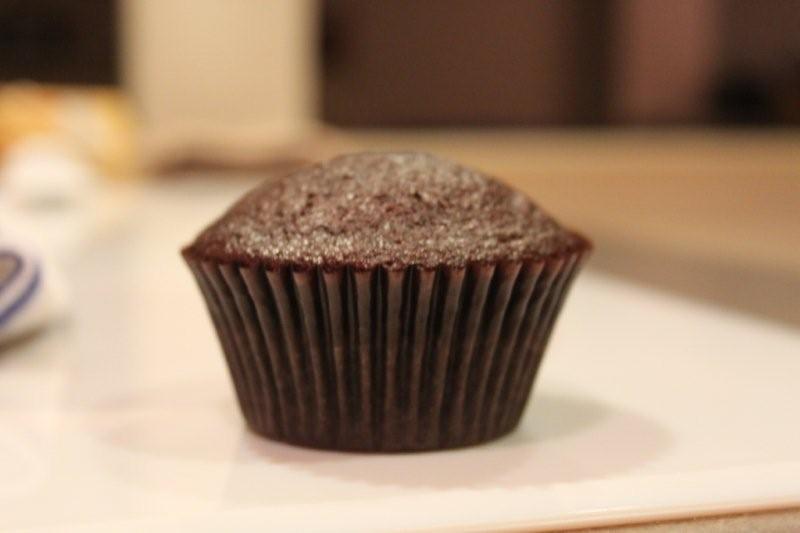 |
| Perfect small dome for this project Not a huge muffin top |
 |
| They can't all be perfect - the kids and Mr. TC love eating the rejects |
You could adapt these to mini cupcakes and probably reduce the baking time to ab0ut 17 minutes. Try it out in your oven and use your toothpicks to test for doneness.
Icing
Even though this was a kids birthday I chose a slightly less sweet icing recipe. This buttercream takes a bit more finesse to make but it is worth the effort as it is light in texture but still sweet enough for the kids). You will need a candy thermometer.
Italian Meringue Buttercream (Recipe Martha Stewart)
Ingredients
Makes 4 1/2 cups
- 1 1/4 cups sugar
- 5 large egg whites (buy pasteurized egg whites in a container to reduce risk of salmonella)
- Pinch of cream of tartar
- 1 pound (4 sticks) unsalted butter, chilled cut into small chunks
- 1 teaspoon pure vanilla extract
Directions
- In a small saucepan over medium heat, bring sugar and 2/3 cup water to a boil. Continue boiling until syrup reaches 238 degrees.on a candy thermometer (soft-ball stage). As soon as it hits this point, race over to your mixer.
- Meanwhile you will have to prepare the egg whites. Place egg whites in the bowl of a standing mixer fitted with the whisk attachment, and beat on low speed until foamy. Add cream of tartar, and beat on medium-high speed until stiff peaks but not dry; do not overbeat.
- With mixer running, add syrup to whites in a stream, beating on high speed until no longer steaming, about 3 minutes. Add butter bit by bit, beating until spreadable, 3 to 5 minutes; beat in vanilla. If icing curdles, keep beating until smooth. If you just use the whisk the icing never looks smooth. So after beating for at least 5 minutes with the whisk use your paddle attachment for another few minutes until it looks like most air bubbles are gone and icing is smooth.
 |
| On high until 238 (soft ball stage) |
 |
| Egg whites with cream of tartar beat into stiff peaks before adding sugar syrup |
 |
| Beating with paddle attachment to finish off - almost all air bubbles gone |
Next to colour the icing. The birthday boy's mom had a very specific blue in mind. It's always hard to tell what the gel food colouring will actually look like so I had to try a few. You can use liquid food colouring instead but I only have gels because they work well with fondant and gumpaste.
 |
| This was the final choice - Royal Blue |
 |
| Sky blue a bit too teal |
 |
| Cornflower blue too gray |
 |
| Baby boy blue |
 |
| Using a 1M tip for a pretty swirl |
Using a piping bag and icing tip is really easier than just using a butter knife and spreading it on. Here is the Wilton's page of how to frost with a 1M tip.
I don't hesitate to use a butterknife to scrape off frosting and redo a cupcake until it's perfect.
 |
| Cupcakes done, now onto the monkeys |
By the way, birthday boys mom also loves polka dots. So I rolled out some brown fondant very thinly and used the tip of a large round piping tip to cut out some polka dots and sprinkled them over top of the cupcakes. Do this step right after icing them. Otherwise it's hard to get the polka dots to sit well in icing that has hardened.
 |
| Fondant polka dots |
These are great basics for any party and bake sale. Now if you want to step it up then head on to part 2 - Monkey Figurines.