h

Twilight, Travel, and Treats

Reflections of a Twihard on all things twilight, travel, and treats.

Now that we finished making the cupcakes in part 1 now we move on trying to replicate this guy.

Birthday boy's favourite stuffy


Here's the final product.

Learn to make these


First thing is that I had to figure out if these monkeys were intended for decoration only or for consumption. Fondant is for eating and gumpaste is for looking pretty. Also, I use toothpicks usually to hold the heads up so it's good to know ahead of time how easily it will need to be removed.

Gumpaste is what you normally see used to make those hard realistic leaves and flowers on cakes at weddings. You can roll and mold it into very fine and thin pieces and it will hold its shape. It dries out very quickly so usually I keep any pieces that I am saving to work on under a small bowl to keep them from drying out.

I use the Satin Ice brand because it comes in big tubs which are cheaper. For a beginner, you can buy gumpaste to start at Michael's and the price is good if you have a 40% off coupon from their email list. This stuff is technically edible but it is chewy, doesn't taste so great but it's a bit sweet, and frankly I don't think it's very good for your gastrointestinal system.

You can make flowers like these and there are lots of tutorials online.

gumpaste flowers from bakinguntilgolden.com


Fondant is usually used to cover wedding and birthday cakes for a smooth finish. It is also good for figurine making but it takes longer to harden and it is harder to make small or thin pieces. If the figurines are intended for consumption then I'll use fondant instead of gumpaste.

Colouring gumpaste or fondant


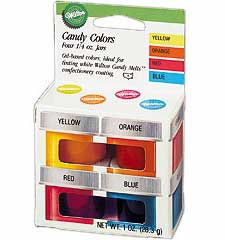
Orange wiltons gel colouring added to the gumpaste with a toothpick - made the night before I plan to make my figurines so I can see the colour darken overnight and add any if I need to.

Store gumpaste or fondant airtight in saran wrap
overnight and in a tupperware to see the final colour as it deepens.

Making the figurines


Using orange gumpaste we have just coloured and also white or a slight beige gumpaste I have already made.

I work on parchment paper which doesn't stick to the gumpaste.

I usually will make a sketch and then a trial figurine. Once I'm happy with the trial I'll weigh it so I can know how much gumpaste to allot for each piece.

Another way of making sure your limbs are even is to roll your gumpaste into a snake shape and then divide it evenly into the number of pieces you need. No weighing needed but visually super easy to do.

First trial, hands are way too big


Using fondant glue or just water with a very fine paintbrush to attach the parts. Fondant glue is a small piece of fondant dissolved with a few drops of water.

Parts include oval head, trapezoid body all made of orange plus 2 long arms, 2 short legs, and a tail all with white gumpaste blended in at the end. You take the long piece for your limb and at the end place a small piece of white (about the size of a piece of Nerd candy) and then roll them together a few times in your palm. The warmth will melt them together quite seamlessly.

The only tools I really use are my hands plus rounded and pointed toothpicks. Honestly the hardest part to do is putting on the ears and making sure they don't fall off.

I break a toothpick in half and stick it into the body first and then the head on top. Also remember to use some water or fondant glue under the head.

For the ears take a small orange ball and indent with rounded toothpick then place even smaller white ball inside and repeat with rounded toothpick. Pinch off the pointy tip and then stick the rounded ear onto the head, using glue or water as mentioned below and your toothpicks to apply pressure. My sister in law uses tweezers but I like using toothpicks and my fingers instead.

Final product isn't he cute?


See above for how to blend the
white into the tail


I use Wilton Edible Food Writers (food colouring pens) fine tip to draw on the eyes and mouth. This part makes me the most nervous because there is no easy redo unless you take the head off and do it all over again.

Here is the group of monkeys I made (it's about 3am by the time I'm finished - can't start until the kids are asleep).

About to attack


I placed them all on disc of orange gumpaste and then onto squares of parchment paper.

Transport


This is the part that strikes fear into any baker. Even if you make it how do you get it there in one piece?

I pack all the figurines on parchment squares in individual gladware or tupper containers. Right before I load them into the car (after they have been drying at least overnight) I gently pack a bit of paper towel around each one to prevent shifting.

In gladware waiting for paper towel to be packed
around each one to prevent shifting


Then I load them onto a baking tray lined with a silpat (either use silicone or a wet towel to prevent slipping around in the car).

Onto the cupcakes I made in Part 1 of this post.

Fondant polka dots


I use a Cupcake Courier and I love it. My sister in law/baking partner JL managed to find them at our local Winner's store (kind of like Ross but with household stuff in addition to clothes) for about $25 Cdn each - steal!
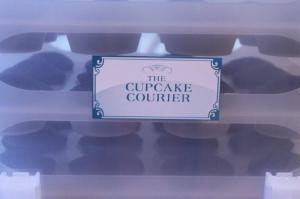


The only downside is there are no trays so far for mini cupcakes. I will have to use my cricut to cut out some plastic adapter sheets later on.

This handy thing fits perfectly in my trunk with one of the third row seats half folded.


Delivery and Set Up


Managing to slow way down around corners and trying to choose the least steep streets to my destination, I finally made it. Mad rush since the Olympic torch was coming down this street in less than 90 minutes and I wanted to be out of there before traffic got too busy.

I brought my ceramic cake stands for set up as well and birthday boy's mommy (who is also the sister of a long time friend) swore to keep my stands safe.


Final set up - Birthday Boy's mommy almost cried, like full on "this is just what I wanted" tears. That made staying up until 3:3oam totally worth it.

Monkey cupcakes finally done!


I'll be updating my Flickr cupcake pics very soon and send out a shout when they're up.

Enjoy and let me know if you have questions.

Today I was going to write about gumpaste monkeys. I'm having a heck of a time getting the colour right so they'll have to wait til next week.

I also promised you a fanfic rec so I'll include a food related one at the bottom of the post. It'll involve him


and one of these


So, first for the wholesome treats. I'll go back in time to one of my favourite sugar creations. Have you seen my Edward and Bella figurines? They used to be  in the upper right sidebar at the About Me listing. That's before I changed to a beautiful new Avatar. This is what they looked like.


I had been dreaming about making these guys for a long time. But there seemed to be no good occasion. You can't just make them for yourself for no reason, can you???

So I was ecstatic when I realized that MK's birthday was coming up in November and we hadn't planned her cake yet. I conspired with Mr. MK to surprise her with her favourite pavlova cake (which I can't make) with my  twilight decorations on top.

I call her Chubbella. Not hard to see why. KStew is stick thin but that doesn't stand up so well on a cake. In fact my Bella is quite a bit heavier than Edward if you include the weight of her hair. I think she looks good this way. Being frail and skinny is not always appealing.

I actually had the most fun making Edward of course. I loved making his hair and getting the right coppery shade was surprisingly easy.

I loved making his hair and sparkly skin


I painted his skin with a bit of white pearl dust mixed with vodka and let it dry. I prop them up a bit with miscellaneous kitchen things (like that rice bowl behind them) overnight while they are drying. It helps to put parchment underneath if you are worried they'll stick.

When transporting figurines I usually pack them with parchment underneath lying flat and then surround them with bunched up paper or regular towels to minimize movement inside a Tupperware container.

Despite all this gentle care I wasn't able to keep them totally from harm. Mr. MK was so excited about giving MK her surprise cake (this was the first time he had done anything like this) that he prepped her cake without waiting for me. I walked into the kitchen to find that he had unceremoniously just shoved my precious dolls into her cake. Screw the parchment squares that I had brought with me. He was so proud of himself I couldn't say anything and just stood there with my mouth hanging open.

MK loved her cake (bless her heart she is easy to please when it comes to twilight). We managed to wipe off all the cake icing and salvage Bella's shoe that had loosened from the moisture. I think Edward and Chubbella are now somewhere in her freezer. This warms my heart to no end as MK is the ultimate minimalist. You would almost think she doesn't believe in the concept of sentimental value the way she declutters her house. But she kept my figurines!! I guess having a best friend for 20 years (!) buys you some real estate in her storage space.

Okay, I promised a fanfic rec and I won't disappoint.

If you are interested in a very hard core lemon one shot (well, two chapters) you should check out Wendy's by KatieBelleCullen. It is full of sexual tension, smut with frosties, and a pierced tongue. I knew I loved those frosties for a reason.

What you get when you google Frosty & Sex
Eva Longoria on popsugar.com

Hope this post satisfied your sweet tooth...

31.1.10

Sugary Sunday

This post is about baking. For all the dirty twihards out there, get your mind out of the gutter and in the kitchen for just a few minutes.

No, I don't own these (pic from http://www.dollymix.tv/


Okay, really, I'm leaving the smut out of this post after this point.

I thought it might be nice to balance out my blog with some wholesome goodness. Must counteract the lust of Fanfic Fridays otherwise I might internally combust. So to keep this blog true to its name I'll start posting Sugary Sundays.

My earliest fondant creation that I have a photo of is this.


They were made for a beach or Hawaiian themed birthday. Apologies to my good friend DQ (for Dancing Queen, not Dairy Queen) that I can't remember why we made these for her daughter. It was years ago.

how to make these


I didn't give an equipment list at the beginning as I'll be explaining what you'll need throughout the post. If you prefer the equipment list and photos at the beginning please let me know for next Sunday. I apologize in advance for the lack of photos with each step as I'm stepping back in time.

let's get started...

The grass was piped by DQ from buttercream piped with a Wilton grass tip (tip# 233).

use tip #233 as a grass tip (in the midde at the top)


I made the sandals by colouring Wilton premade fondant with Wilton gel food colouring. Note, this is not the liquid you buy in bottles from the supermarket. Use a toothpick to transfer a bit of colouring into the fondant and knead the colour in. Be careful as it stains your hands.

Comes in a huge rainbow of colours but these are the basics of course


Next roll fondant to about 1/8 inch thick. If the rolling pin sticks you can use powdered sugar to dust a bit. Careful with the sugar on coloured fondant because it makes it look, well, powdery. Some people put the sugar in a clean nylon stocking and tie the top to make a dusting bag.


You can use a wooden pin but if you're really serious you can buy a mini roller like this


that is non stick and also comes with rings to help you get a consistent thickness. Some people use their pasta machine too.

Cut out the sandal base with a mini butterfly cookie cutter.

best butterfly cutter - Wilton Easter mini set


Then with a sharp craft/exacto/paring knife cut the sandals out from the butterfly. Yes, you will have some wasted fondant from the middle of the butterfly. You can always mix back into your fondant ball to make the next batch. Smooth edges with fingers.

Make the top of the flip flop by rolling out and cutting a small rectangle of a contrasting colour. Then cut a slit down 3/4 of the way so that it looks like a pair of pants. Use fingers to smooth edges.

Attach the top to the sandal using a very very small amount of clear liquor like vodka dabbed from a tiny paintbrush. I attached the top of the pants first and then used a round toothpick under the "knees" to keep them a bit raised and finally attached the foot of the pants.

Lastly roll and colour the fondant for the flowers. Cut out using the smallest gumpaste flower cutter you can find. I bought this set from Michael's with my 40% off coupon

Wilton gumpaste flower kit - use the tiniest flower


I know it seems like overkill to buy a whole kit for a small flower. If you do enough cake decorating you'll find this set invaluable (the 40% coupon from Michael's email list helps). They do sell individual gumpaste cutters but they are quite expensive so this started kit is actually a good deal.

Lastly the centre of the flower was made with an indent from the tip of a Wilton #2 icing tip (this is the one that people usually use to write names on cakes with).

Round tip #2 (on lower left) comes in all basic cake decorating kits


If you own a basic metal icing tip set from the supermarket it should have a #2 tip inside.

Let them harden up on some parchment paper overnight before you put them on your cupcakes the next day. If you put fondant decorations on buttercream icing more than a couple of days ahead I have found that the fondant gets soft and melts. I usually try and put them on last minute.

If you have any questions, let me know.

Up next week - Fondant Daisies